Replacing the bearing in a vertical loading washing machine is a rather time-consuming process. For repair, you will need to disassemble most of the device and reassemble correctly and efficiently. In order for the procedure to be successful, you should carefully prepare, act according to the instructions. If you stock up on free time, patience and the necessary tools, you can change the spent part yourself.

Tool kit for work

If the “vertical” drum has increased play, the machine rattles and rattles unusually at revs of any speed, you will need:
- Screwdriwer set.
- Screwdriver.
- Set of open-end wrenches.
- A selection of hexagons.
- Metal rod.
- Bearing kit suitable for your model. They are sold at specialized points in online stores. Knowing the name of the model or having an old part with you, you can easily get a new one. The price is from 100 to 1000 rubles.
- Oil seals. Replaced with other elements, often sold in one repair kit.
- Special grease for parts.
- A camera or smartphone with a quality camera. Take step-by-step photos when disassembling to make it easier to return components to their rightful places.
Safety precautions
When repairing household appliances, do not neglect safety rules:
- Free up workspace.
- Prepare a small container for small parts.
- Disconnect the machine from the network.
- Shut off the water supply.
- Only power a fully assembled, ready-to-use model.
Bearing replacement in a vertical washing machine
Unlike the front camera, the drum on the vertical is mounted on both sides. That is, the drum has two side walls, and the flaps and the lock are on top. This is a feature of all vertical models, regardless of brand name. Dismantling of the Bosch, Electrolux, Virpul and other firms washers can be carried out according to one algorithm. Both Bosch and Brandt will have to be disassembled almost to the screw.
Step-by-step dismantling of the vertical AGR:
- Using a flat-blade screwdriver, pry the control panel from the sides and release.

- Pull the module up and towards you, but not so much so as not to damage the wires.
- Lift the panel at an angle and remove the wires by pulling the terminals from the connectors. Do not forget to take a photo before disconnecting, so that after you connect everything as expected.
- Now you can completely remove the panel by unscrewing the fasteners.
- Remove the rubber hoses by disconnecting them from the clamps. This will remove the filler valve.
- Undock the wires and press outside the holes to squeeze the valve.
- Remove the side panels by unscrewing the fixing screws, be sure to save the washers that perform the function of grounding the case. Bend the “side plate” and slide it down. Thus, access to the front panel bolts is freed up.

- Remove the bolts that secure the front of the chassis.
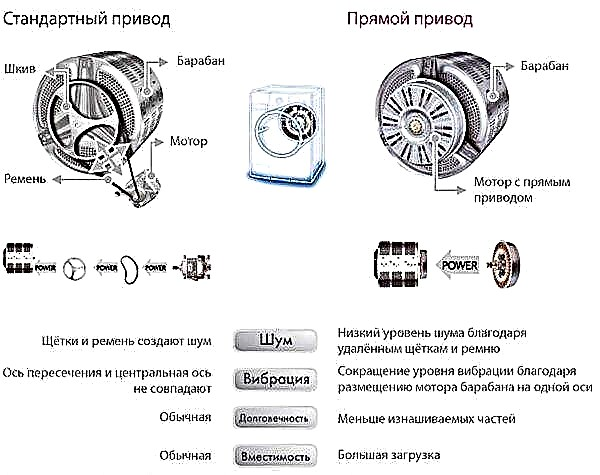
- Remove the belt pulley.
How to change bearings
Due to the design features, the vertical drum has two bearings, so you will have to replace two sets of bearings, not just the failed one. A “one-way” replacement can lead to an imbalance, and the second bearing will also fail, and you will have to do all the work again.
So, we act in stages:
- Remove the pulley from the drum.

- Remove the ground near the support by unscrewing the bolts with a Phillips screwdriver.
- Take out the old caliper using the lever method: insert two screwdrivers opposite into the holes of the support, placing the shaft between them, push and unscrew.

- Thoroughly and accurately clean the shaft, grease it and the oil seal before installation. This will extend the bearing life.

- After replacing, put the pulley in its rightful place.

- Screw back the ground, removed at the very beginning.
- Tighten the nut that holds the pulley.
- Tighten the drive belt.
- Attach the side walls.
- Next, mount in the reverse order, using the photos taken during the process as a hint.
- You can run the test mode.
As you can see, you can replace the bearings with your own hands without the help of a master. If you have excellent tools, you will certainly succeed. We wish easy repair!